Building a Pokemon Go Raid Tracker
— Product Development, Software Development, Python, Django — 11 min read
Why
Halfway through 2017 Pokemon Go launched raids at Gyms.
These raids allowed for a collaborative battle of multiple players against a boosted Pokemon.
A few months after Niantic launched the legendary raid bosses. This saw even bigger Pokemon being fault that could only be caught via raids.

Shortly after the first legendary raids started appearing an event in Japan was held that saw an exclusive pokemon — Mewtwo as a raid.
Niantic then announced that Mewtwo would be released in a new type of raid — an EX-Raid.
This raid type would be invitation only and would require the player to meet a set of criteria:
- The player must have completed a raid at the Gym that the raid would take place at ‘recently’
This has since been clarified (if you can call it that) to also involve:
- The Gym is in park
- The player must have the gym badge for the Gym (which you get for completing a raid anyway)
With the criteria set out for the EX-Raid system many people starting to compile spreadsheets of different gyms and started to track their progress.
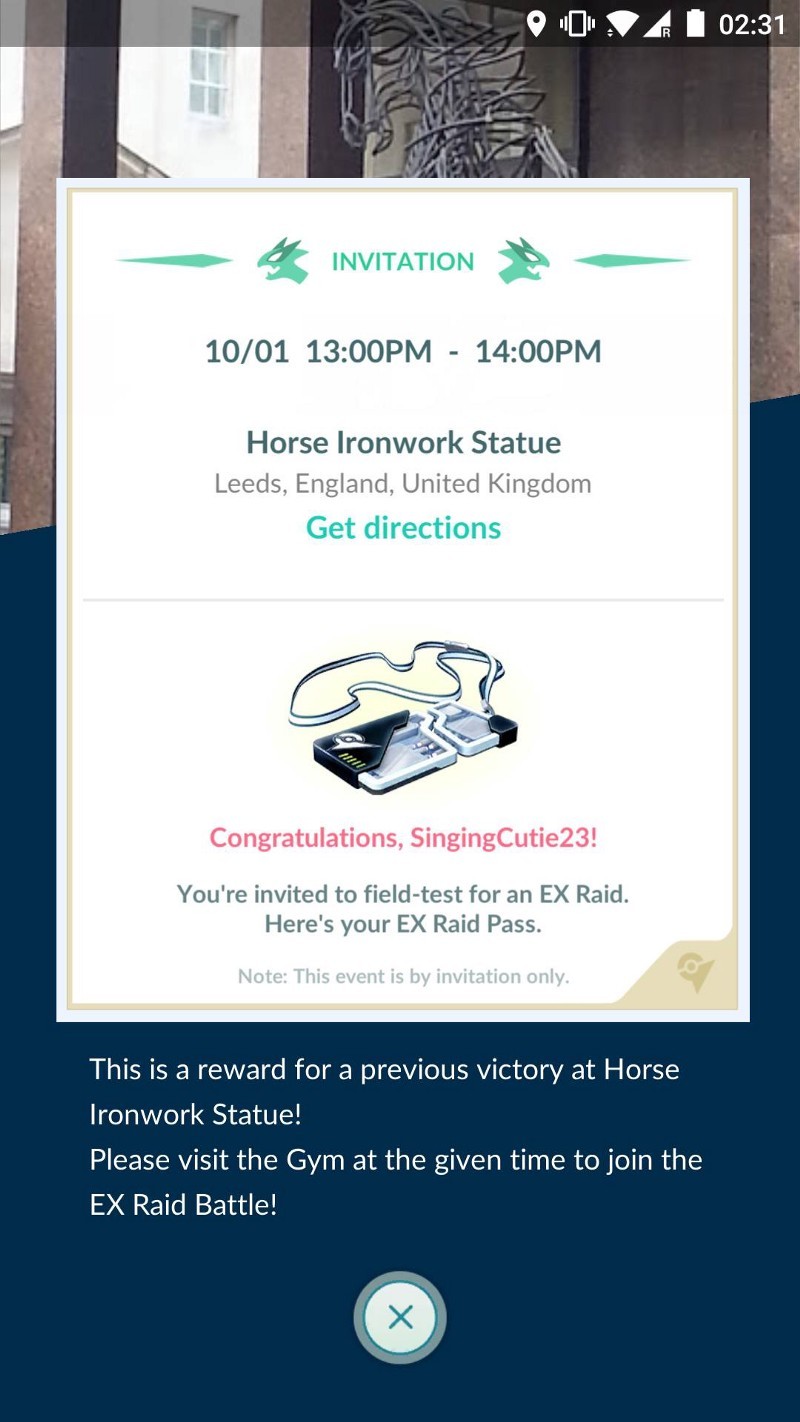
Being a software developer I decided to make a simple web app to do this for me.
Designing a raid tracker
The design was simple
- Have a list of gyms in the city centre of Leeds
- Whenever you complete a raid on the gym log it
- Group the list so you know which gyms you need to do raids at
I built a few screens in Sketch and worked with a mate to get a general feel of the flow before setting up a Django stack and cracking on.
One of the side effects of collaborating with people share your excitement for Pokemon Go and tech is that ideas are generated at a rapid pace and it’s hard to get them all jotted down.
A few key features of a decent raid tracking app were defined however:
- User can enter date and time of raid
- Load live raid data to prevent user from having to enter data about pokemon
- Have means for people to arrange raids
- Have analytical features so players can understand the EX-Raid system better
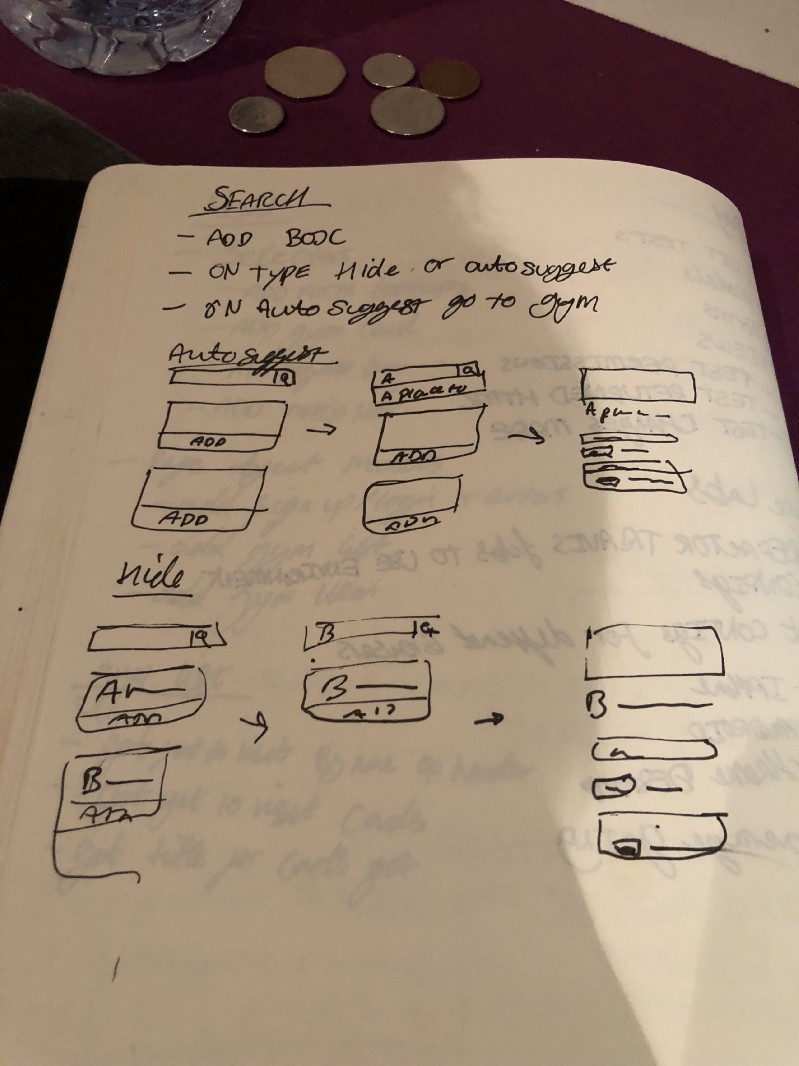
Testing the idea
The first iteration of the app took me about 2 nights to program and was a very basic Django app.
I’d been in a bit of a slump after struggling to get another idea for a CV creation app off the ground so it was really great working into the small hours of the day and rocking into work knackered by excited about that nights progress.
I announced the app on the Leeds Facebook group which was received well.
After a few days of using the first iteration of the tracker I started to realised that simple data collection wasn’t that great.
Sure being able to see which gyms to attend raids at was useful but there were a number of Pokemon Go websites that had the raids from the game on them.
By bringing raids into the tracker that would allow people to see a list of the gyms they need to do raids at that had raids happening on them and thus give them all the data they needed to get that EX-Raid pass they were craving.

Adding raid data from Pokemon Go
So I contacted the person running one of the maps that most people in Leeds use to see if there was a means to get the data into my tracker app.
Initially the person running the Pokemon Go map wasn’t interested in helping me with my project. They had a number of people asking for access to the data and no time to set anything up.
Also I was pushing for web hooks instead of polling as this would allow for realtime updates.
In the end I got their permission to scrape the endpoint they were using in their frontend.
As the app was deployed in Heroku I used the Scheduler addon which allowed for a 10 minute polling interval so the load wasn’t too bad for their website.
I then wrote a little bit of JavaScript to act as a countdown for the timestamps I was returning so it seemed a bit more dynamic and shipped this to the people using the tracker.
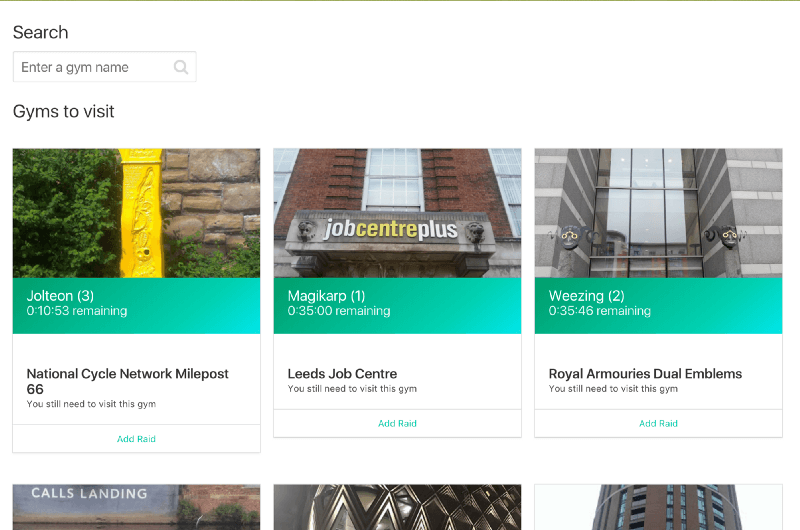
The feedback from people once I added the raid data was really reassuring that I was onto something.
One person told me that the tracker changed the way they approach raids as it turned the process of finding raids to attend into a simple checklist for them.
Unfortunately the live raid data proved to be very finicky. The system used to run the map would be upgraded, the JSON format would change and I’d end up working to early hours trying to understand why the raid data wasn’t working.
Additionally as the map app I was scraping was behind a cloudflare instance I had some fun with failing requests. However the excellent cfscrape library made this a doddle to solve.
As the person running the map app I was scraping was swamped with requests it was hard to get support on any of this although I found that donating towards the project helped in this regard.
In late October the raid JSON from the map app changed and the API url enforced a token for authentication which meant I could no longer scrape the data.
However the person running the Pokemon Go map came through and announced they were making a public API and gave me an API key to test it.
Unfortunately it looks like this API was hand rolled as there was no JSON validity checks on the responses.
Ultimately after months of asking for the API to return valid JSON I resorted to writing my own function to cleanse it ready for use.
I’m now getting about 1,500 raid instances from this API which meant the next task was to expand the area the tracker covered.
Keeping on top of 3rd parties
In order to manage the issues I was having with the API I was scraping I decided to install Sentry into my Heroku setup.
Sentry listens to events in my apps log and gives me a nice GUI to analysis what went wrong even if the event happened 2 weeks ago.
This was very crucial for understanding if API calls failed due to poorly formed JSON, CloudFlare rejecting traffic or changes to the scraping code breaking everything.
I also set up a Slack for myself and the few people who are interested in the development of the project. I have Sentry, Github and Heroku post into this so that I can keep an eye on things at work as well as on the move.
Github now allows for a kanban like board to manage the issues and pull requests on a project so I’m using this to manage the backlog of things for the app.
A great tool for managing project dependencies I’ve found is pyup. It’s similar to services like Greenkeeper but for Python projects. This helps you keep on top of new releases to libraries you depend on and tests them against your codebase for you.
Expanding the scope of the app
To add all 650 odd gyms (at time of writing) in the Leeds area meant a refactor of the UX was needed.
The initial app was just a list of 38 gyms so wasn’t too hard to manage adding raid battles to items even if they were at the bottom of the list.
I have to admit at this time I hit a bit of a slump as there were a number of EX-Raids that were popping up in Leeds and none of them were in the area my tracker covered.
I felt that I’d missed my shot at making something useful to people, I’d also attempted to redo the frontend in React which seemed like a massive task to undertake so my morale was low.
Then I took 18 days off for christmas which allowed me to dive back into development and time away from the gym management problem meant I was able to focus better.
It took me a few days to refactor the app and rewrite the BDD tests I had to correspond with the new UX.
During my time rewriting the BDD I decided to try our HipTest.
I’d originally just thought of it as a means to have a GUI around feature writing but after playing around with it realised it allows for a separation between feature development and the implementation of the steps.
This means via the HipTest GUI you can focus on creating feature definitions and test runs and in the codebase focus on implementing the Selenium side of things.
Similar to before I launched the ‘full Leeds rollout’ on the Pokemon Go Leeds page on Facebook.
My suspicions that I may have missed an opportunity were confirmed a little bit when it received about a tenth of the interest than before.
Still, I’ve decided to continue building it as while creating the API scraping scripts I’ve realised that it would be easy to port the project to the other places covered by the Pokemon Go map app.
Over the christmas period I built up a backlog of ideas for the app which once the frontend refactor is completed will really add extra value for users.
Before I can implement those though I needed to create an API for the new frontend to consume.
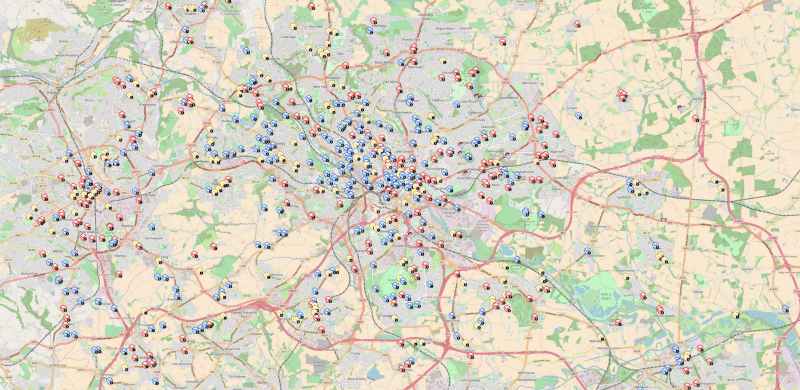
Designing an API for the app
I’d used toast before on a Django project but I was well aware that was outdated so I looked at what was available and it seems the defacto framework is django_rest_framework (DRF) so I went with that.
I decided to use the JWT library for DRF as it was easy to set up. After sorting out how I was going to authenticate users I started to plan out the API.
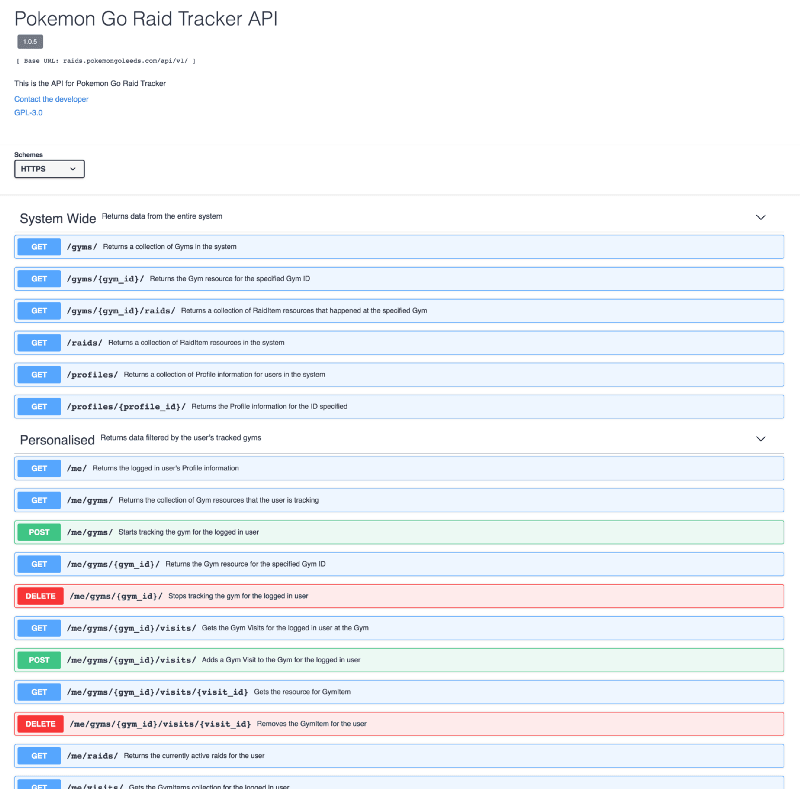
I’d attended a talk at my day job where SwaggerHub was shown as a good way of designing and communicating a API specification so I decided that’s how I’d approach my API.
Being able to define the JSON returned for the different models and map these to the different ReST endpoints before writing any code really helps.
It allows you to iterate and the Swagger UI does a great job of letting you experiment with different ways of defining the API.
SwaggerHub also has this really great virtserver service which allows you to test your API based on your Swagger doc.
This ability to iterate and test allowed me to change some potential design mistakes (like using an action to add an item to a collection instead of just using POST on the collection).
Creating the API for the app
Once I’d got the API finalised I moved to coding it.
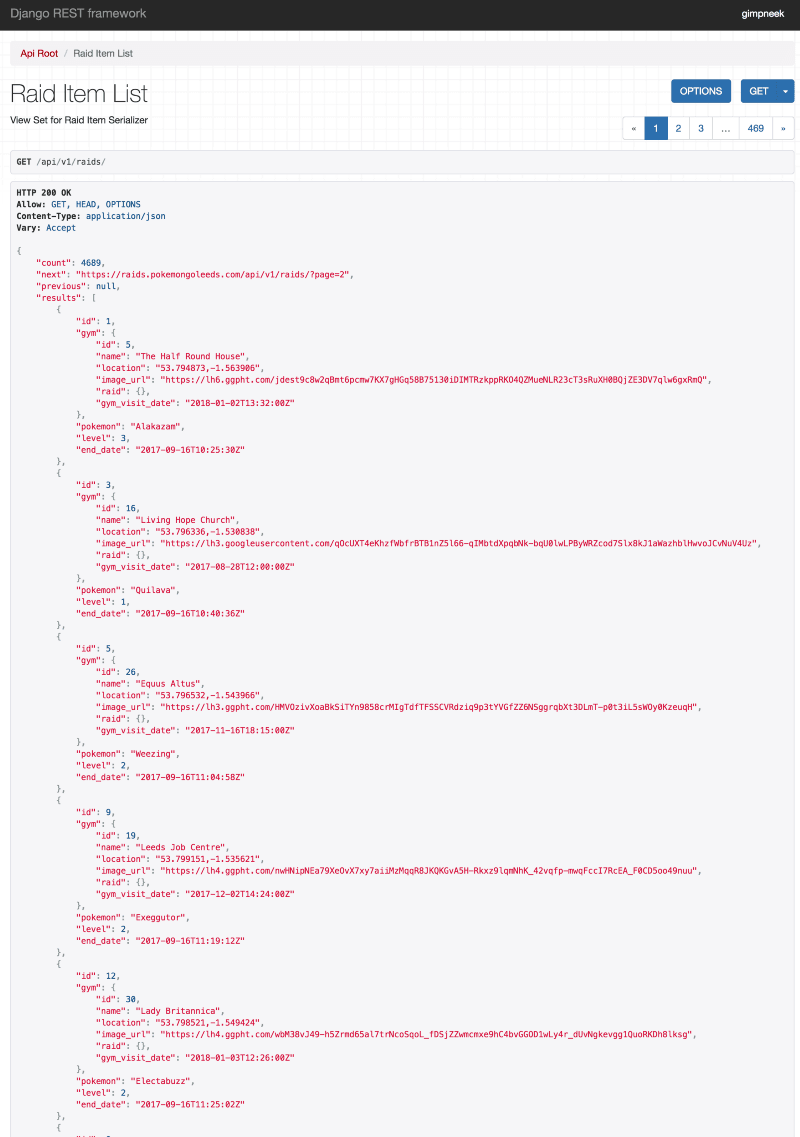
Django Rest Framework works by :
- Creating a serialiser which defines how you want to convert the Django model to JSON
- Creating a view which generates a queryset of the model’s records which are then serialised
- Creating a router which is the endpoint that the view is returned on
As my API had nested collections I needed to add DRF extension that handles that but it was all very straight forward once I got my head round it.
The biggest development effort was more on the testing side. As I had a very well defined API specification I wanted to add tests for every HTTP verb and for to test the returned JSON structure.
Even though it was long the tests allowed me to TDD the development of the API as I could catch mistakes quickly and I now have a fully functioning API ready to be used by the new frontend.
Scaling up and performance
I initially started rolling the tracker out with the 38 gyms that I considered to be in the Leeds city centre, at this point I was getting about 150 raids a day via my scraper.
In order to help people figure out where it was likely there would be raids I added an ‘Analytics’ page which listed the most common gyms, levels, days and hours that raids appeared on those gyms over the period of a week.
When I decided to expand to cover the entire 650+ (at time of writing) gyms I knew I’d get a lot more but I wasn’t sure exactly how many a day I would get — it turns out I get about 1800 raids a day for the new gym set.
When I originally wrote the analytics page for the tracker I hadn’t really thought about scaling it up to cover the 13,000ish raids I’d be receiving for a week.
On about day 4 after I expanded the scale of the tracker I noticed that the analytics page was taking 10+ seconds to return and it crashed a number of times — Not Good!
My initial implementation was getting all 9,000 raid (at that point) records as Python objects and then iterating over these to sort them into different lists I would then create counts for the different stats.
For 9,000 raids I was getting 9,000 records in memory then iterating over that list 4 times to create new lists so that’s 46,000 items in lists — even with Python only storing references to the initial 9,000 items that’s still a lot of memory being consumed. And this is for one page load!
So I set out to correct my terrible mistakes and optimise the way I was collecting this data.
Here’s the steps I took:
- Collect the IDs only of the raids that took place during the week — this will remove the need to read the objects
- For each statistic get the raids with the IDs in the ID list then do a group by to get the count of the different aspects (level, day etc)
- Order each list so the group with the most items is at the top
Collecting the IDs was simple, Django has a .values() method you can use when querying a model. You just define the fields you want to return.
Doing the group by was a little harder, Django offers you a .annotate() method to do this which is used in conjunction with the .values() call from earlier.
The complexity with the .annotate() method comes when you want to do things like get the day of the week from a datetime field.
Luckily Django has an ExtractWeekDay method to help with this. You just call it in an .annotate() method to create a new field you can then do the .values().annotate() query chain on.
The side effect of using .annotate() is that there’s no longer a Queryset being returned so you need to update your templates to work with dictionaries or convert the values to a tuples before rendering.
With the new optimised queries in place I was able to get page rendering back down to less than a second which meant that those who’d shown an interest in the data set could start looking for trends in the data.
If you’re interested in the refactor you can check out the commit with most of the changes here: https://github.com/Gimpneek/exclusive-raid-gym-tracker/commit/3adc34d42f2ddc053afc6ec6530955a96ee77d3e
Automating S2 cell analysis
After watching Trainer Tips video on S2 cells (recommended by a fellow player) I decided to use this to calculate which gyms were viable for an Ex-Raid.
To do this I followed these steps:
- Get the names and locations of all Gyms in the tracker
- Using osmcoverer get the S2 cells for the Gyms at zoom level 12
- For each of these S2 cells query Open Street Map (OSM) for features as per this query on PokemonGoHub
- Convert the OSM data into geojson and feed that back into osmcoverer to get a list of Gyms that are within the OSM features
- Update the gyms that are with the OSM features in the tracker
There are 209 S2 cells for the area covered by Gyms in Leeds which means the data collection takes about 30 minutes.
I’m sure this can reduced by running jobs in parallel however. I’m also considering creating a Docker image for these scripts as this would allow anyone to run it.
Configuration drift
After creating the S2 cell analysis scripts I pushed up the new changes to the gym_fixtures.json file I use to manage the Gyms in the system.
It turns out that in doing so I fell foul of a bit of configuration drift I had done on the production server.
In order to get the IDs referenced in the API that I use to get the Raid data I run a script which gets the ID from a JSON dump and saves that the Gym record.
I would then normally dump the new Gym setup into the fixture file, deploy it and load it into production.
Turns out I didn’t do this the last time so suddenly all the Gyms had the wrong IDs! Worse still some Gyms had no ID which meant the raids for those Gyms were not being collected.
It was a pretty issue to solve, create a mapping from the old Gym to the new one and then update every Raid record since the issue started but it meant I lost a good 1300 Raid records.
I’d come across configuration drift while reading about devOps and why it’s important to have infrastructure as code and set up monitoring to ensure that any changes made on the server are reported.
It turns out that it’s not just server configuration that is prone to this type of thing!