Create Connections Between Objects with Konva and React
— JavaScript, Software Development — 5 min read

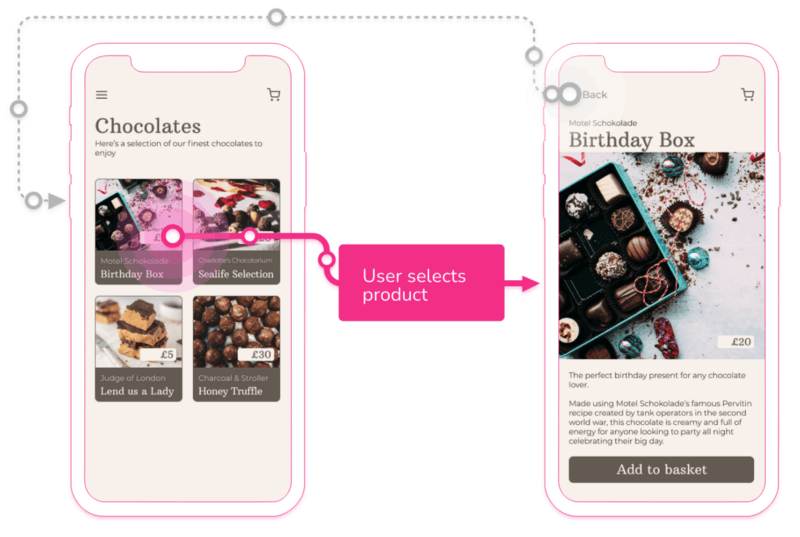
The app I’m currently working on (Reciprocal.dev) provides users with an interactive User Journey Map which essentially contains a number of User Journey steps connected together by lines in a manner similar to a flow chart.
While we validated the idea using a hardcoded set of data and hand-cranked SVG paths after, we were sure we had something worth pursuing. The next big piece of work was to build an editor so users could create their own User Journey Maps.
This editor would need to allow users to create a number of steps in the User Journey and then drag a line between two of the steps in order to connect them. This is a common pattern used in many tools such as Miro so the UX was already defined but there was still the question of how to implement the behaviour in my chosen canvas framework — Konva.
Connecting objects
Luckily the Konva website has a number of really useful examples that showcase different techniques. One of these examples is ‘Connected Objects’ which has a number of circles connected by a set of lines.
There were a few differences to my set-up (I’m using react-konva) but I was able to adapt the example into a basic proof of concept of how the connection would work.
The key takeaway from the example however was the data structure for the connection. Instead of just drawing a line independently for the objects it’s connecting, the line uses the position coordinates of the source and destination objects so that when those objects are moved, the lines position moves also.
For a straight line like the one used in the example, this means that there are no position coordinates for the line as it just references the two objects it’s connecting.
The connections I wanted to build though weren’t as straightforward, as I wanted the user to be able to then reposition the source and destination points of the line within the connected objects so they could visualise the elements on a screen that would trigger progression along the User Journey.
In order to achieve this, I amended the data structure to also include offsets that could be applied to the position coordinates. When the user moved the source or destination points these offsets would be updated which would then mean if one of the connected objects moved then the point’s position would still reflect what the user had wanted.
1{2 "to": "object-1",3 "from": "object-2",4 "offsets": {5 "to": {6 "x": -15,7 "y": 3058 },9 "from": {10 "x": 170,11 "y": 36312 }13 }14}Building the UX to create a connection
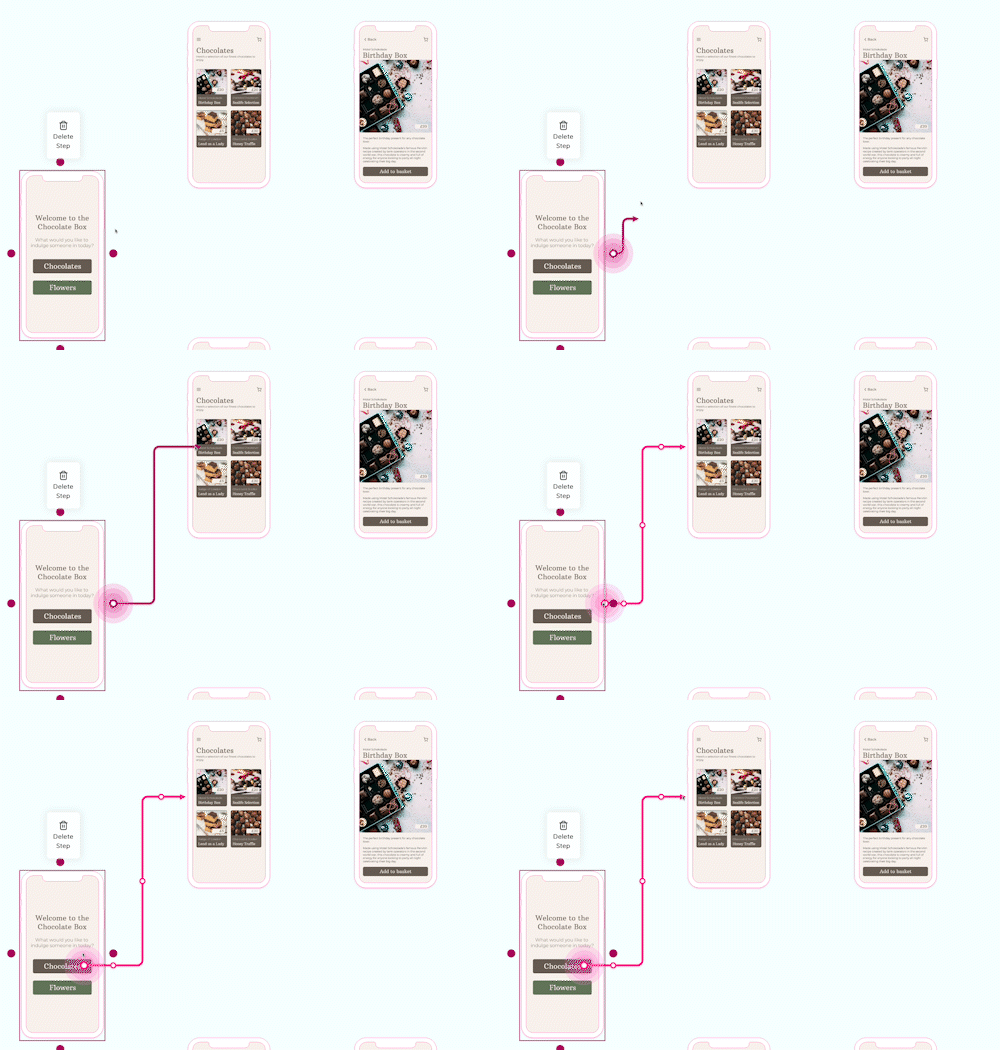
The UX for creating a connection in tools like Miro is to have a border around a selected object which has a set of ‘anchors’ that when dragged will create a line that follows the pointer's position. When the user releases the pointer while hovering over another object then the line will be converted into a connection between the two objects.
There are a number of components that are needed to build this interaction pattern:
- The objects that will be connected
- The border that will highlight the selected object
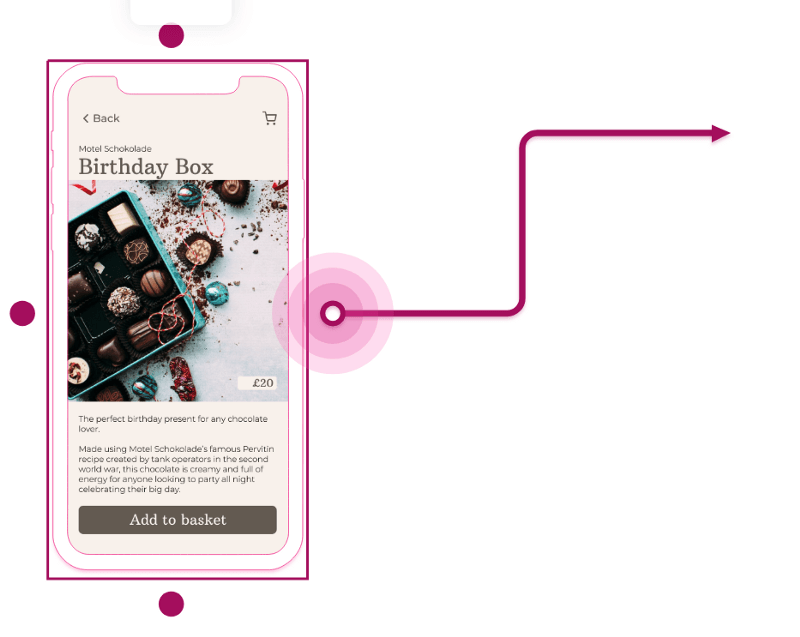
- The anchor points on the border that when dragged will act as the source point for the line
- The line that will go from the anchor point to the pointer's position
- The final connection between the source and destination objects
I’ll be covering the border, the anchor points, the line and the connection in this post as the objects that will be connected can just be any object, so for any examples, I’ll just use some basic rectangles.
Creating the selected object border

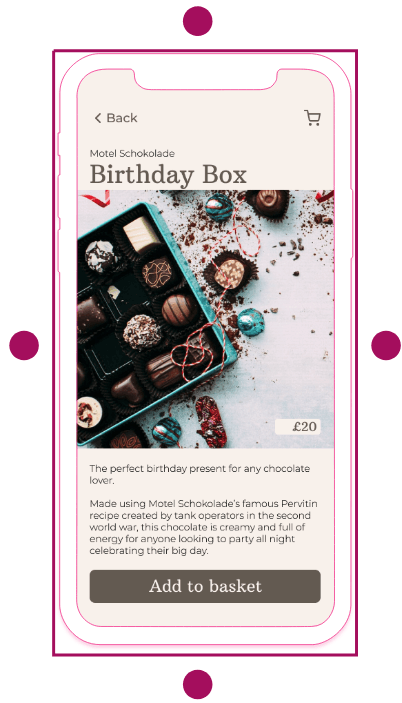
To create the border component I created a Line that formed a rectangle that would be the same dimensions as the object it would surround, and when at the same position as that object, would look like there was a border around it.
The reason I used a Line and not a Rect to achieve this was because if the Rect had no fill it would still block the click events of any items underneath it which meant that the desired ability to move the source of the connection within the connected object wouldn’t have worked.
I found it easier to create a new Layer to render the border and its anchor points on as this ensured that these would always be above any other elements rendered on the canvas.
In order to know if an object is selected or not there needed to be some form of state to track which steps are selected. This means there needs to be a means of easily identifying each object.
To do this I created a map of objects that would be iterated over to render the objects on the canvas, each of these objects had an ID which would be the key that would then be added and removed from an array of selected objects to track its selection state. This array of selected object IDs would then be used to render an array of borders for those objects. I also created an array of connections to render on the map (more on that later).
I then created an onClick handler for the object so that when the object was clicked it would toggle the ID’s inclusion in the array of selected objects.
1import React from "react";2import { Stage, Layer, Rect, Text, Line } from "react-konva";3
4const SIZE = 50;5const points = [0, 0, SIZE, 0, SIZE, SIZE, 0, SIZE, 0, 0];6
7function Border({ step, id }) {8 const { x, y } = step;9 return (10 <Line11 x={x}12 y={y}13 points={points}14 stroke="black"15 strokeWidth={2}16 perfectDrawEnabled={false}17 />18 );19}20
21
22const App = () => {23 const [selectedStep, setSelectedStep] = useState(null);24 const { steps } = INITIAL_STATE;25
26 function handleSelection(id) {27 if (selectedStep === id) {28 setSelectedStep(null);29 } else {30 setSelectedStep(id);31 }32 }33
34 const stepObjs = Object.keys(steps).map((key) => {35 const { x, y, colour } = steps[key];36 return (37 <Rect38 key={key}39 x={x}40 y={y}41 width={SIZE}42 height={SIZE}43 fill={colour}44 onClick={() => handleSelection(key)}45 perfectDrawEnabled={false}46 />47 );48 });49
50 const borders =51 selectedStep !== null ? (52 <Border53 id={selectedStep}54 step={steps[selectedStep]}55 />56 ) : null;57
58 return (59 <Stage width={window.innerWidth} height={window.innerHeight}>60 <Layer>61 <Text text="Click a rectangle to select it." />62 {stepObjs}63 {borders}64 </Layer>65 </Stage>66 );67};68
69render(<App />, document.getElementById("root"));Adding anchors to the selected object border
With the border implemented, I then needed to add the anchors that would be used to create the line and ultimately the connection if the user released the pointer over another object on the map.
I amended the border component to add circles at the top, bottom, left and right-hand sides with a 10px margin so that there wouldn’t be conflicts with the border shape.
To add the dragging behaviour I then added the draggable prop to the circle and added a dragBoundFunc that would lock the circle in place when being dragged. The behaviour for the circle to remain static when being dragged wasn’t as easy as I had hoped though.
The position that is passed into the dragBoundFunc is an absolute position and expects an absolute position to be returned, however, if the anchors are within a group the position coordinates will be relative to the group so if the group isn’t positioned at 0,0 you may encounter issues with circles moving about when dragged.
I solved this by using a ref for the Circle and returning the absolute position of the ref (if it was set) within the dragBoundFunc .
With the anchor point set to be stationary the next step was to make sure a line was created and updated when the user dragged the anchor point.
1import React from "react";2import { Line, Circle } from "react-konva";3
4const SIZE = 505const points = [0, 0, SIZE, 0, SIZE, SIZE, 0, SIZE, 0, 0];6
7function getAnchorPoints(x, y) {8 const halfSize = SIZE / 2;9 return [10 {11 x: x - 10,12 y: y + halfSize13 },14 {15 x: x + halfSize,16 y: y - 1017 },18 {19 x: x + SIZE + 10,20 y: y + halfSize21 },22 {23 x: x + halfSize,24 y: y + SIZE + 1025 }26 ];27}28
29function dragBounds(ref) {30 if (ref.current !== null) {31 return ref.current.getAbsolutePosition();32 }33 return {34 x: 0,35 y: 0,36 }37}38
39function Anchor({ x, y, id }) {40 const anchor = useRef(null);41 return (42 <Circle43 x={x}44 y={y}45 radius={5}46 fill='black'47 draggable48 dragBoundFunc={() => dragBounds(anchor)}49 perfectDrawEnabled={false}50 ref={anchor}51 />52 )53}54
55export function Border({ step, id }) {56 const { x, y } = step;57 const anchorPoints = getAnchorPoints(x, y);58 const anchors = anchorPoints.map((position, index) => (59 <Anchor60 key={`anchor-${index}`}61 id={id}62 x={position.x}63 y={position.y}64 />65 ));66 return (67 <>68 <Line69 x={x}70 y={y}71 points={points}72 stroke="black"73 strokeWidth={2}74 perfectDrawEnabled={false}75 />76 {anchors}77 </>78 );79}Showing a line when the anchor is dragged

As the line only needs to be shown when an anchor is dragged I decided to use state to store either a Line component or null depending on if a drag is happening.
This meant that I could add a render of this state value above the other items in the Group I created for the border and anchors and as null doesn’t render anything in React it would only show the line when the drag was active.
The drag lifecycle in react-konva has three stages; onDragStart , onDragMove and onDragEnd so I created handlers for these that would create and set the Line in state during onDragStart , update the destination coordinates to the pointer’s position during onDragMove and set the state to null during onDragEnd .
1import React, { useState } from "react";2import { render } from "react-dom";3import { Stage, Layer, Rect, Text, Line } from "react-konva";4import { INITIAL_STATE, SIZE } from "./config";5import { Border } from "./Border";6
7function createConnectionPoints(source, destination) {8 return [source.x, source.y, destination.x, destination.y];9}10
11const App = () => {12 const [selectedStep, setSelectedStep] = useState(null);13 const [connectionPreview, setConnectionPreview] = useState(null);14 const { steps } = INITIAL_STATE;15
16 function handleSelection(id) {} // Removed for brevity17
18 function handleAnchorDragStart(e) {19 const position = e.target.position();20 setConnectionPreview(21 <Line22 x={position.x}23 y={position.y}24 points={createConnectionPoints(position, position)}25 stroke="black"26 strokeWidth={2}27 />28 );29 }30
31 function handleAnchorDragMove(e) {32 const position = e.target.position();33 const stage = e.target.getStage();34 const pointerPosition = stage.getPointerPosition();35 const mousePos = {36 x: pointerPosition.x - position.x,37 y: pointerPosition.y - position.y38 };39 setConnectionPreview(40 <Line41 x={position.x}42 y={position.y}43 points={createConnectionPoints({ x: 0, y: 0 }, mousePos)}44 stroke="black"45 strokeWidth={2}46 />47 );48 }49
50 function handleAnchorDragEnd(e, id) {51 setConnectionPreview(null);52 }53
54 const stepObjs = Object.keys(steps).map((key) => {}); // Removed for brevity55 const borders = selectedStep !== null ? () : null; // Removed for brevity56
57 return (58 <Stage width={window.innerWidth} height={window.innerHeight}>59 <Layer>60 <Text text="Click a rectangle to select it. Drag the anchor to create a connection between the objects" />61 {stepObjs}62 {borders}63 {connectionPreview}64 </Layer>65 </Stage>66 );67};68
69render(<App />, document.getElementById("root"));Creating a connection if the pointer is released over another object

I had orginally attempted to use the onMouseOver event listener for determining if the pointer was released over an object but as the Line is under the pointer when a drag is happening this never fired so I then looked at getIntersection being called against the object but in the end decided to remove the hit logic from the object itself and keep it with the dragging logic instead.
To detect if the drag is released over an object or not I created a simple function that detected if the pointer’s position was within the bounds of the objects and as part of onDragEnd iterate over the objects to find out if there’s an intersection.
If the pointer is within the bounds of an object when the drag is released then the starting object and the object the drag was released over are used to create a new item in the connection array stored in state.
1import React, { useState } from "react";2import { render } from "react-dom";3import { Stage, Layer, Rect, Text, Line } from "react-konva";4import { INITIAL_STATE, SIZE } from "./config";5import { Border } from "./Border";6
7function createConnectionPoints(source, destination) {8 return [source.x, source.y, destination.x, destination.y];9}10
11function hasIntersection(position, step) {12 return !(13 step.x > position.x ||14 step.x + SIZE < position.x ||15 step.y > position.y ||16 step.y + SIZE < position.y17 );18}19
20function detectConnection(position, id, steps) {21 const intersectingStep = Object.keys(steps).find((key) => {22 return key !== id && hasIntersection(position, steps[key]);23 });24 if (intersectingStep) {25 return intersectingStep;26 }27 return null;28}29
30const App = () => {31 const [selectedStep, setSelectedStep] = useState(null);32 const [connectionPreview, setConnectionPreview] = useState(null);33 const [connections, setConnections] = useState([]);34 const { steps } = INITIAL_STATE35
36 function handleSelection(id) {} // removed for brevity37 function handleAnchorDragStart(e) {} // removed for brevity38 function getMousePos(e) {} // removed for brevity39 function handleAnchorDragMove(e) {} // removed for brevity40
41 function handleAnchorDragEnd(e, id) {42 setConnectionPreview(null);43 const stage = e.target.getStage();44 const mousePos = stage.getPointerPosition();45 const connectionTo = detectConnection(mousePos, id, steps);46 if (connectionTo !== null) {47 setConnections([48 ...connections,49 {50 to: connectionTo,51 from: id52 }53 ]);54 }55 }56
57 const stepObjs = Object.keys(steps).map((key) => {}); // removed for brevity58
59 const connectionObjs = connections.map((connection) => {60 const fromStep = steps[connection.from];61 const toStep = steps[connection.to];62 const lineEnd = {63 x: toStep.x - fromStep.x,64 y: toStep.y - fromStep.y65 };66 const points = createConnectionPoints({ x: 0, y: 0 }, lineEnd);67 return (68 <Line69 x={fromStep.x + SIZE / 2}70 y={fromStep.y + SIZE / 2}71 points={points}72 stroke="orange"73 strokeWidth={5}74 />75 );76 });77
78 const borders = selectedStep !== null ? () : null; // removed for brevity79
80 return (81 <Stage width={window.innerWidth} height={window.innerHeight}>82 <Layer>83 <Text text="Click a rectangle to select it. Drag the anchor to create a connection between the objects" />84 {stepObjs}85 {borders}86 {connectionObjs}87 {connectionPreview}88 </Layer>89 </Stage>90 );91};92
93render(<App />, document.getElementById("root"));Result
I’m quite happy with the way the connection creation works within Reciprocal.dev and hopefully, this post has shed some light on how to achieve similar results.
I think there are a number of applications for this type of behaviour such as building a whiteboard or flowchart design tool so I’m hoping that the code can be reused across multiple domains.
You can see a simple demo of the behaviours and code I’ve covered in this post below.